 We have a new home and a new look for our RGA Design LLC website and blog. We have added some new products, free projects, and video tutorials. Our old website served us well but as we often say in our family, "It was good but it is gone." (That quote works great for old cars, apartments, toys, and even for our kids' old girl or boy friends.) The old blog rgadesignquilts.blogspot.com is still active with older posts but I will post on the new blog from now on. New Products Skillbuilder Filler Finesse (36" x 43") is our new panel designed to develop and hone free motion quilting skills. The panel has hooks, loops, straight lines, s-curves, arcs, pebbles and feathers. The lines are wide giving some wiggle room for some wobbly quilting and it even has some subtle arrows to give direction. We can brag that it was eco-friendly digitally printed in the USA. Price $15.00 Introductory Sale $13.50 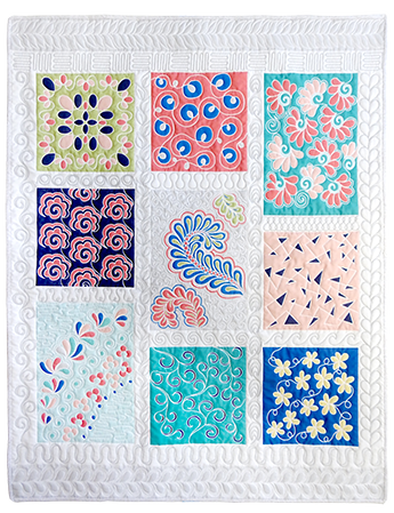
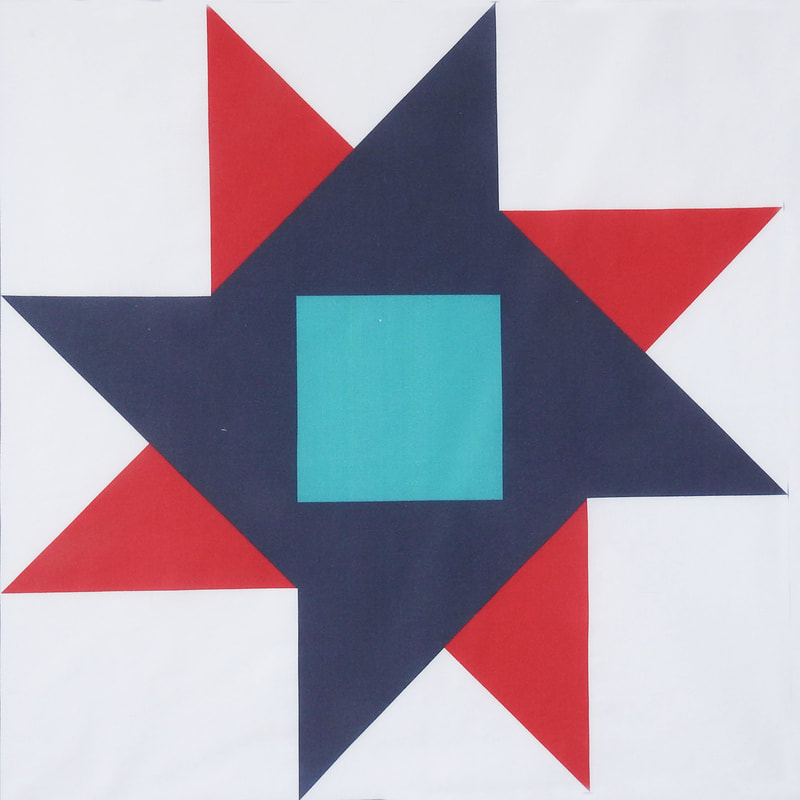
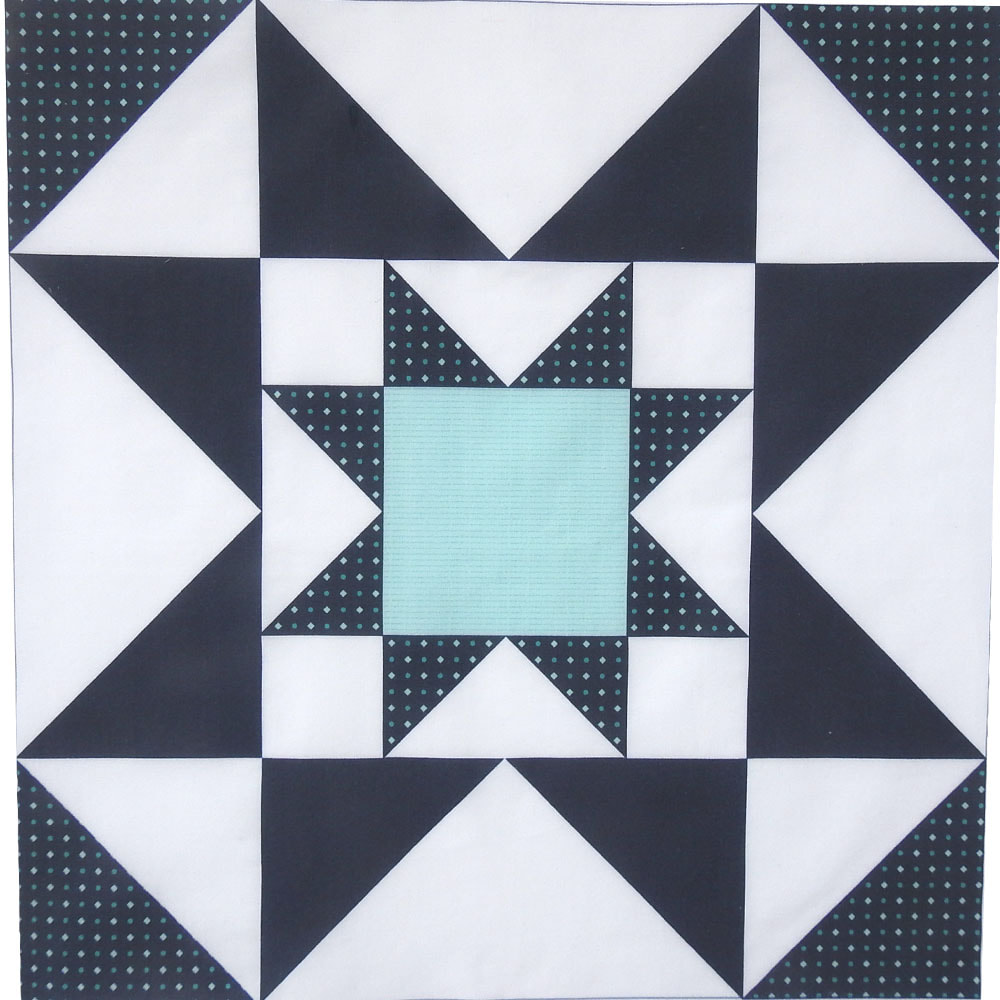
Traditional 16" Blocks
Another new product we are introducing is six different printed blocks. These blocks are the perfect project to practice using rulers and templates or free motion quilting. They may be purchased individually or all six as a packet. Watch for videos tutorials which we will post on our website with ruler, design, and pattern suggestions. These blocks are also digitally printed in the United States with an eco-friendly process and without harmful chemicals.
|

Tuesday, April 23, 2019

Strips for Stripes Bag
I designed this Strips for Stripes bag as an exclusive for Bernina and it has been very popular! It is made with the quick "quilt as you go" or "stitch and flip" technique. You can sew it scrappy with all different prints from your stash, coordinate and repeat fabrics, or use jelly roll strips. The handles on both bags are purchased but they could easily be stitched out of fabric. The instructions are free and were previously posted on the We All Sew Blog. Now they are also on my new website on the Free Projects and Patterns page. Our website is: https://www.rgadesignquilts.com/


Thursday, March 3, 2016
Ten Minute Table Runner Written Instructions
Edelle's Question: Where are the written instructions for the 10 Minute Table Runner? (My page link is not cooperating at the moment!)
Here is a working link:
http://www.rgadesignquilts.com/store/images/Twelve%20Minute%20Gift%20Bag.pdf
Here is a working link:
http://www.rgadesignquilts.com/store/images/Twelve%20Minute%20Gift%20Bag.pdf
Wednesday, September 23, 2015
Beginning and Ending for Machine Quilting - WE ALL SEW Video
Check out my new video tip on WE ALL SEW which was posted this week. I demonstrate how to pull up the bobbin thread and secure stitches for machine quilting with a walking foot and a free motion foot. There is also a clever tip for toggling between tiny securing stitches and regular stitch length. The tip works great with BERNINA machines.
 |
| WE ALL SEW BLOG VIDEO |
Wednesday, May 20, 2015
"How to Make a Summer Book Tote"
"How to Make a Summer Book Tote" is my post on the BERNINA We All Sew Blog. My friend and I made this tote for our grand daughters to carry their scriptures. The finished size is 13" x 7 1/2" and a perfect size for small books. Nicole said it is a "happy" bag because the colors make her feel happy. The sewing and quilting instructions are on the We All Sew Blog: http://weallsew.com/2015/05/08/how-to-make-a-summer-book-tote/


Thursday, April 9, 2015
60 Degree Triangle Baby Quilt
 |
| Katie's Quilt |

Next I cut strips (6" x Width of Fabric). I used my Marti Michell 60 Degree ruler to cut triangles on the 7" finished width line. I also trimmed the bottom corners as Marti recommends. It makes sewing much easier and more accurate.

We started with five colors but discovered we needed three more for the look Katie had in mind. Besides looking better, it was easier to do a random design with more colors!

After the quilt was pieced it was time to figure out how to quilt it. I played around with different line options and finally decided the channel lines were my favorite. I used a quarter inch thick ruler to quilt the straight lines and didn't mark anything. I stitched in the ditches to travel from one line to the next. Thank goodness for rulers - or my lines would not have been parallel or straight!
Monday, April 6, 2015
Baptist Fan Template

My sister Janet Selck (Scrapsoftimequilts.com) designed and pieced this quick and easy pattern for her son and his bride. It was so quick, so easy and so fun that we made four different quilts using this design. For the quilting on this quilt I used Teryl Loy's slotted fan ruler on my Innova long arm. (Teryl's video demonstrates how to use the template.) These blocks are eight inches so the 2" template was perfect. The first row took over an hour because my thread kept breaking and I was quilting slowly. I changed the needle and the thread breakage problem went away. I increased speed as I gained confidence and I quilted the last row in less than 20 minutes!

I have tried the slotted ruler using my Quilt Foot and my BERNINA 820. It worked great on a sample block but I need to try it on a border and an actual quilt.
Subscribe to:
Posts (Atom)